As you probably already know, we are the Homebrew Happy Hour. This is the podcast where we answer YOUR homebrew questions and we discuss all things related to craft beer!
On Today’s Show:
Todd is out of town on business (believe it or not, sometimes we get work done!) so James hung out with me to discuss the upcoming HomebrewCon, what’s been brewing, and we took some of your questions on hops and cereal mashing. It was a blast, as always, to hang out with James and I know you’re going to love this week’s show!
We want to hear from you!
As always, If you have a question that you’d like us to discuss on a future episode, please click on the “Submit a Question” link at the top of our website or you can now call in your questions via our questions hotline @ 325-305-6107 and leave your message after the beep. This is a friendly reminder that, if we choose your question for a future episode, we give you a $25 gift card to that episode’s sponsor! Easy-peasy, right?
Today’s show is brought to you by Kegconnection.com! Check out Kegconnection’s brand new “Brewer’s Club Rewards” program which gives you points for every purchase and the ability to earn FREE points simply by sharing content or participating in various activities. You can redeem your points for discounts on future orders, FREE SHIPPING, FREE GIFTS, and a whole lot more so go to Kegconnection.com for more information. Homebrew Happy Hour listeners who shop at Kegconnection.com can use the promo code “HHH” to receive 5% off your order.
CO2 cylinders are necessary for drafting beer (or whatever beverage you’re running through your kegerator/keezer) because they provide that wonderful beer gas to push the lovely beverages into our glass. Maintaining them isn’t difficult yet understanding them can seem overwhelming – at first. We’re here to help you navigate and understand what all those weird looking signs, symbols, and characters that are stamped onto your cylinder actually mean. So, whether you end up buying a brand new CO2 cylinder or maybe you find a great deal at a garage sale, you can be sure that you know whether or not your cylinder can be serviced or filled without having to spend additional money getting it up to date.
DOT-3AL1800: “DOT-3AL” is the US Department of Transportation’s specification for seamless aluminum cylinders with a minimum service pressure greater of 150 psi. “1800” is the service pressure rating of the cylinder in psi.
CC357769: This is the serial number for the cylinder
M5659: This is the “M number” or manufacturer’s number issued to Metal Impact South by the US DOT.
11A16: The “11” represents the month of manufacture, November, and the “16” represents the year of manufacture, 2016. The “A” in the middle is the mark of the independent inspector. The manufacturing and testing of DOT-3AL cylinders must be witnessed by an approved independent inspector. The “A” is actually an arrowhead symbol identifying Arrowhead Industrial Services as the independent inspector. All CO2 cylinders have a manufacture date. Re-certified CO2 cylinders also have a certification date. The most recent date on the cylinder is the currently active date. The most important date to know when purchasing a cylinder is when the cylinder was last re-certified. Re-certification includes hydro-testing. The Department of Transportation (DOT) requires that most portable CO2 tanks, both new and used, be re-certified every five years. Nitrogen and other high pressure inert gas cylinders generally have a 10 year re-certification requirement (although there are exceptions). Certification must be performed by a DOT-licensed facility.
M with line coming down through it vertically: This is a symbol for Metal Impact. The vertical line is a capital i.
5#: This is the maximum mass in pounds of CO2 that can be filled into this cylinder.
T7.40LB: Tare weight of cylinder and valve in pounds.
TC-3ALM124: “TC-3ALM” is Transport Canada’s specification for seamless aluminum alloy cylinders with a minimum service pressure greater of 1.0 Mpa. “124” is the service pressure rating of the cylinder in bar.
T3.36KG: Tare weight of cylinder and valve in kilograms.
and we thank you for joining us once again for the Homebrew Happy Hour show! This is the podcast where we answer YOUR homebrew questions and we discuss all things related to craft beer!
Tuesday of this week was “National Homebrew Day” and last week I had solicited from you all to leave us a voicemail or a text message at 325-305-6107 telling us what you love about homebrewing. The only issue was that our voicemail inbox wasn’t working and I only found out because a handful of you guys reached out to let me know! I was able to get your messages via text and also email so we did get to include you guys and I appreciate every one of you who did submit input. I’m sorry I couldn’t include but a handful of your messages but, good for you, Todd was still OK with me giving EVERYONE who messaged a Kegconnection gift card… so, there is that!
On Today’s Show:
Alongside your messages for National Homebrew Day, we also took a question that was about our brewing experience. It’s always nice for me to hear Todd and James remissness about their brewing past and I genuinely enjoy hearing their stories and how far they’ve come in their brewing styles.
We want to hear from you!
As always, If you have a question that you’d like us to discuss on a future episode, please click on the “Submit a Question” link at the top of our website or you can now call in your questions via our questions hotline @ 325-305-6107 and leave your message after the beep. This is a friendly reminder that, if we choose your question for a future episode, we give you a $25 gift card to that episode’s sponsor! Easy-peasy, right?
Let us know what you think and enjoy the show!
cheers,
joshua
Today’s show is brought to you by Kegconnection.com! Check out Kegconnection’s brand new “Brewer’s Club Rewards” program which gives you points for every purchase and the ability to earn FREE points simply by sharing content or participating in various activities. You can redeem your points for discounts on future orders, FREE SHIPPING, FREE GIFTS, and a whole lot more so go to Kegconnection.com for more information. Homebrew Happy Hour listeners who shop at Kegconnection.com can use the promo code “HHH” to receive 5% off your order.
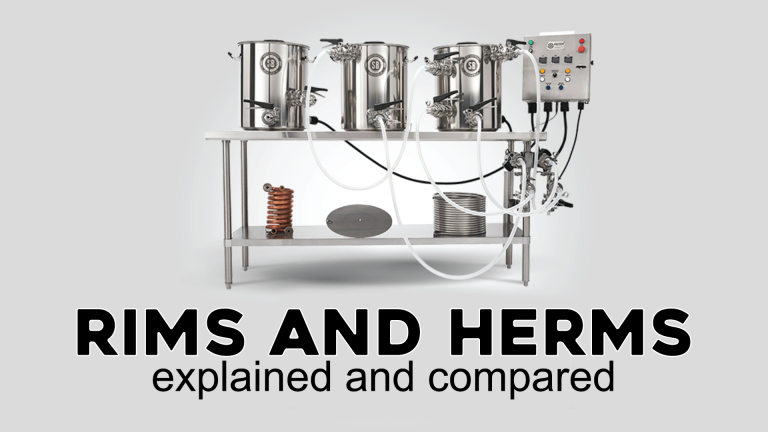
With multiple choices of solid all-in-one brewings systems on the market, a lot of people are choosing these as their option when making the jump to all-grain brewing, and for good reason. They are compact and easy to store, making them an excellent choice for people with limited space. Most of them are electric, so you can easily brew indoor and avoid harsh weather conditions. They are reliable systems with a fair amount of automation, and are capable of making a consistent product. The majority of these systems use a basket within a kettle for the mash, and then you rest the basket above the kettle to perform the sparge. Some of the options include a pump giving you a RIMS system (Recirculating Infusion Mash System) which helps increase your efficiency and consistency. In this article I will break down some of the options we offer and go through some of the pros and cons of each system. We can talk about what each system includes and their price points.
The Grainfather is one of the first of its kind on the market and offers some of the nicest accessories. The newer, current version, called the Connect has Bluetooth capability so you can control the unit from you phone. It allows you to set up programmable step mashing temps, and features delayed heating so you can fill your Grainfather with water the night before and wake up to your water at strike temperature. The graphic display is waterproof and allows you to use it in manual mode or with the app. It also gives you alerts when your attention is needed for the next step of your brew so you can easily multitask or relax in between steps of your brewday. The unit itself is constructed of 304-grade stainless steel and has a total capacity of 8 US gallons. The grain basket can hold up to 20 lbs. of grain, so you can certainly get away with brewing some monster beers. The US version runs off of 110-120V and puts out a whopping 1,600 watts. Some of the available accessories include a Conical Fermenter, Hop Spider, Insulation Jacket, Sparge Water Heater, Fermenter Cooling Kit, Glycol Chiller, and all of the replacement parts you may need. The Grainfather Connect includes a counterflow chiller, making one less item needed for the entire process. This system is on the high end of the price range, but from personal experience I really think it’s the best in class. The company provides fantastic support and a 24-month warranty should anything go wrong with your unit, and the machine produces some really tasty results – $998.98 MAP (Minimum advertised pricing) .
The Robobrew V3 is another option that’s becoming more popular with their new release. It mirrors the Grainfather in some aspects, as in the stainless steel construction, inclusion of a pump and chiller. The stainless steel immersion chiller is a bit different, but serves the same purpose as the Grainfather’s counterflow chiller. Once again, the only thing you really need other than the brewing unit itself is a vessel for fermentation. The Robobrew also has the function of programmable stages, allowing you to set up 6 different temperatures and durations for step mashes or delayed start to heating of up to 23 hours in advance. This way you can have your water hot and ready to go when you get home from work or wake up in the morning. The Robobrew is slightly larger with a total capacity of 9 US gallons, but they recommend not going over 18 lbs. of grain. Much like the Grainfather it contains dual heating elements that run off of a single 110 volt plug and have individual switches allowing for more control over the heating process. You can use both elements for rapid heating at a combined 1500 watts, or individually to maintain a boil or mash temperature. You won’t get quite as many selections for accessories on this system, but some of the obvious choices are still available like the Insulation Jacket and replacement parts. This system comes in at a lower price while not lacking too many of the benefits of the Grianfather, so some are considering it a better bang for your buck – $449.99 MAP (Minimum advertised pricing).
The Mash and Boil from Brewer’s Edge is more similar to the Robobrew, but offers the system both with and without a pump for recirculation. This flexibility is nice, especially if you’re already in possession of a brew pump, or want to create your own recirculation set-up. Most of the other mechanics will work the same, but it is a bit smaller of a system overall. It has a maximum capacity of 7.5 US gallons and a recommended limit of 16 lbs. of malt. It also runs off the same 110V plug and bolsters a 1600 watts heating element. Similar to the other units, it features a delayed start timer, so you can program the Mash and Boil to turn on up to 24 hours after setting. Again, this allows you to wake up or come home from work with your water already heated to strike temps and ready to brew.
The unit itself is double-wall constructed with stainless steel and includes most of the features that our previous two systems have. One thing it is missing is a chiller, as neither counterflow or immersion is included. This sets our price down some making it the most economical option of the bunch. The standard Mash and Boil system runs $299.99 MAP and the version that includes the pump sits at $419.99 MAP (Minimum advertised pricing).
Whether you or someone you know is considering making the plunge into all grain brewing and looking for a compact, easy to use unit – these options should most certainly be considered. If you have any questions about some of the specifics of the units please feel free to email them to [email protected] – you can also check out more details on these and other all-grain brewing systems on our site anytime at – https://www.homebrewsupply.com/brewing-equipment/all-grain-brewing-equipment/all-grain-brewing-systems.html
About the Author
Ladik Joe Ermis is the Director of Operations for HomebrewSupply.com ! He has been brewing for many years and has been creating many of the recipes for our site.
Thank you for joining us once again for the Homebrew Happy Hour show! This is the podcast where we answer YOUR homebrew questions and we discuss all things related to craft beer!
Next week is “National Homebrew Day” and we want to hear from YOU! Leave us a voicemail or a text message at 325-305-6107 telling us what you love about Homebrewing and, if we use your message on the episode, we’ll send you a $20 gift card for Kegconnection.com!
ALSO: This is a heads up that we finally have our HomebrewCon booth number! Come visit us this year in Providence, Rhode Island during the 2019 National Homebrew Convention from June 27-29th at booth # 719. We’ll have more info coming soon on how you can sign up for some freebies from us and we may even organize a meetup with you all while we’re hanging in Providence. We’re VERY excited and can’t wait to meet you all in person and share our booth’s beer with you.
On Today’s Show:
Todd (Kegconnection) and James (CMBecker) join me again on the show to help answer all of your homebrewing questions! The first question asks about what exactly might happen if you mash at warmer or colder than recommended temperatures. Also, what should be expected if you mash for longer or shorter than the recommended amount of time? It’s a great question that we (and by we, I mean James) had a great time discussing. Also, there was a question about how to choose hops when crafting a recipe and I actually learned a lot listening to Todd and James (and by “Todd and James” you know I really only mean James) discuss what they do for recipe building. All-in-all, we’re very excited to present this week’s show to you!
We want to hear from you!
As always, If you have a question that you’d like us to discuss on a future episode, please click on the “Submit a Question” link at the top of our website or you can now call in your questions via our questions hotline @ 325-305-6107 and leave your message after the beep. This is a friendly reminder that, if we choose your question for a future episode, we give you a $25 gift card to that episode’s sponsor! Easy-peasy, right?
Today’s show is brought to you by Kegconnection.com! Check out Kegconnection’s brand new “Brewer’s Club Rewards” program which gives you points for every purchase and the ability to earn FREE points simply by sharing content or participating in various activities. You can redeem your points for discounts on future orders, FREE SHIPPING, FREE GIFTS, and a whole lot more so go to Kegconnection.com for more information. Homebrew Happy Hour listeners who shop at Kegconnection.com can use the promo code “HHH” to receive 5% off your order.
Thank you for joining us once again for the Homebrew Happy Hour show! This is the podcast where we answer YOUR homebrew questions and we discuss all things related to craft beer!
We hope you had a wonderful holiday weekend last week with lots of time with family and delicious homebrew. I was lucky enough to have LOTS of homebrew on tap – my aunt & uncle brewed a California Common and it was ready by Easter Sunday and then my pop and I also took our homebrewed IPA with us to the family gathering and it was a big hit too. Too much fun, friends!
On Today’s Show:
I’ve been spoiled rotten lately having both Todd (Kegconnection) and James (CMBecker) on the show to help answer all of your brewing questions. On this episode, we received two questions recently regarding yeast. One asks about what to expect when you ferment a beer near the lower temperature spectrum recommended by that yeast company versus the higher temperature end of the spectrum. The other question asks very plainly – how do you know which yeast to choose when there’s so many options?! It can be overwhelming but, hopefully, we provide some clarity for you today.
We want to hear from you!
As always, If you have a question that you’d like us to discuss on a future episode, please click on the “Submit a Question” link at the top of our website or you can now call in your questions via our questions hotline @ 325-305-6107 and leave your message after the beep. This is a friendly reminder that, if we choose your question for a future episode, we give you a $25 gift card to that episode’s sponsor! Easy-peasy, right?
Today’s show is brought to you by Kegconnection.com! Check out Kegconnection’s brand new “Brewer’s Club Rewards” program which gives you points for every purchase and the ability to earn FREE points simply by sharing content or participating in various activities. You can redeem your points for discounts on future orders, FREE SHIPPING, FREE GIFTS, and a whole lot more so go to Kegconnection.com for more information. Homebrew Happy Hour listeners who shop at Kegconnection.com can use the promo code “HHH” to receive 5% off your order.
Ah, stout. Black velvet in a glass, topped with a rich, creamy head you could eat with a spoon. Enthralling cascades of bubbles as the head settles, and a heavy lace left behind. Silky-smooth mouthfeel with just a tiny hint of carbonation. It sure would be nice to brew something at home that had the magical qualities of a well-pulled glass of stout. It may seem out of reach, but if you brew and condition your beer appropriately, and serve it correctly, you actually can get that same experience at home. The key to the whole thing is nitrogen gas.
What is a Nitro Pour, and When Should I Consider One?
There are a couple of things to be aware of before you pour all your beer through Nitro. If you try this with a beer that already has a rich mouthfeel, it may become even heavier, and can even feel almost oily. Partly because there’s less gas to come out of solution and bring them to your nose, aroma can be diminished – and we all know aroma and flavor are linked, so this in turn can mean an apparent reduction in flavor. And last but not least, serving on nitro will diminish the perception of hop bitterness.
This means that your crazy-aromatic, 120 IBU triple IPA is probably not the best candidate for this treatment. The best choices will be lower in alcohol and body and fairly richly flavored, preferring malt flavors to hops. Not to say those other beers wouldn’t be interesting on nitro, but this really is a method made for milder stouts.
How to Serve Your Beer with Nitrogen
Featured Product
CMBecker V3N Nitro Faucet
The CMB V3N Nitro Faucet is German Engineered faucet for dispensing Nitrogenated Cold Brew Coffee and Nitro beers like Guinness. This modern, forward seal faucet design is easier to clean and does not look out of place with your other beer faucet or your standard cold brew coffee faucet. This faucet, like other CMB V3 series faucets utilizes a forward seal piston chamber to eliminate “Sticking” issues. This is the faucet the cold brew coffee community has been waiting for! If you serve homebrewed nitrogenated beers this is also the faucet for you.
$49.95 Order Now
To serve homebrewed stout on nitro, you’ll need to begin with a kegging system, and add some components. There are bottled stouts with a nitro pour, but it’s simply not practical for homebrewers to bottle beer with the widget in the bottle and the high pressure of nitrogen required for the cascading pour.
Of course, you’ll need a stout faucet. This is a specially designed faucet that includes a restrictor plate inside. This completely blocks off the flow of beer through the faucet except for the needle streams that come through the small holes. It’s really the turbulence caused by the beer’s passage through these holes that causes the magical dense, cascading head.
In order to push the beer through these tiny holes at any kind of reasonable rate (and to generate the turbulence you need), you’ll have to push the beer much harder than you would to pour regular carbonated beer through a standard faucet. Most people pour nitro beer at around 30 PSI. And, because carbonation levels are related to storage temperature and carbon dioxide pressure, if we did this with nothing but CO2, the beer would soon be massively over-carbonated. Since the turbulence caused by the restrictor plate causes most of the dissolved gas to come out of solution, over-carbonated beer would gush impressively if served at high pressure through a stout faucet.
Clearly, then, we need to push the beer with a gas that won’t dissolve so readily in beer. Fortunately, nitrogen* has the properties we need. For ease of handling, the easiest thing to do is to add a bottle of “beer gas” to your kegging rig. Your usual gas supplier may very well sell it – they might know it as “Guinness gas” or just mixed gas for beer. What you’ll get is usually about 75% nitrogen and 25% CO2, although that may vary somewhat. You’ll also need the correct regulator for this bottle, as it will use left-handed threads. If your usual supplier looks at you oddly when you ask for these things, look for a gas supplier that specializes in beverage and tavern supply.
One optional thing that makes setting up for nitro much easier is to add a diffusion stone to the keg you intend to serve from. Do this by adding a length of tubing to the short dip tube under the gas-in post, long enough to reach the bottom of the keg, and installing an airstone on the end so that the stone sits on the bottom of the keg.
Setting Up Your System For Nitro Pours
Now, well-equipped, we’re ready to start setting up some beer for nitro pour.
First, force-carbonate your beer with carbon dioxide – but not very much. Remember that the stout faucet will cause gushing if there is too much CO2 in solution. Even the 1.5 to 2.0 volumes you would use for a British pale ale is too much; you should consult a carbonation calculator and aim for 1.0 to 1.2 volumes. In fact, freshly fermented beer kept on the cool side should contain almost enough dissolved gas that you’ll hardly have to add any at all.
Second, get some nitrogen gas into the beer. You can do this just by hooking up the chilled keg to the beer gas at 30 PSI for a couple of weeks, but if you opted for the diffusion stone, you can do this in a couple of hours. Since the gas will be injected in fine bubbles at the bottom of the keg, it will get into the beer much more quickly. Put 30 PSI of beer gas on the beer, then vent the headspace every few minutes to get more gas flowing. Do this for a half-hour or so, let it rest for a half-hour, and then do another half-hour of the vent/pressurize cycles.
Third, hook it up and serve. Pour into a tilted glass until the glass is about three-quarters full, then close the faucet and put the glass down for a minute to let the head settle a bit. Then top up so the head is just proud of the lip of the glass, and serve with pride.
Remember when you had to go to the bar for a pour like this?
About the Author
Josh Drew is a second-generation homebrewer and has been brewing since 1992. At that time, information was much harder to find and other homebrewers were harder to connect with. As such, he learned to brew from Charlie Papazian, FIDONet, and a really terrible homebrew shop. Things are much, much better now, and so is the beer he’s making.
*due to shipping regulations, we cannot ship nitrogen or co2 canisters filled with gas.
One of the questions that I get the most (being in the draft beer industry) is how to control foam. Ninety nine percent of the time, when someone is having an issue with excessive foam it is due to one or more of the three causes of foam: temperature, restriction, and carbonation levels. I will cover the three causes and their cures and then discuss the more obscure causes of foam.
Temperature
Temperature is the number one cause of foam for home draft system users. The temperature of your beer should be between 36 and 38 degrees. If your beer is warmer than this you are going to get foam, unless you use additional restriction or have your beer carbonated to a lower level. It is often discussed that British beers are served at a warmer temperature. It is no accident that they are also carbonate their beer at a lower level too. There is a direct correlation!
It is also important to remember that the inside temperature of your kegerator is not the important factor, but the actual temperature of the beer as it enters you glass. Beer temperature can be different from the kegerator temperature for several reasons, including:
Tower temperature. If you are using a beer tower it needs to be insulated and have air flowing through it. Most towers come insulated and if your draft beer system does not have a tower cooler, you can easily add one. If you don’t have one installed, your first ounce or two of beer might come out pure foam but then settle down as you finish pouring.
Shanks can get warm as well, so it is a good idea to purchase a shank that is a few inches longer than you need in order to have some transfer of the cold inside your kegerator or keezer to the outside of the shank. Remember that you have VERY little beer in the shank, so, although you might get an initial amount of foam when you first pour, it should go away once you cool down the shank as you continue to pour.
If you just kegged your beer or just put a commercial keg in the fridge it will take awhile for it to cool down and maybe even longer than you think. One of the main reasons new kegs tend to foam is that they have not cooled down enough. This can also be very misleading because after a short period of time the thermometer in your kegerator may read 38 degrees. Then, you pour a foamy beer and assume temperature is not the issue. Therefore, it is important to have the thermometer in your glass and NOT only in your kegerator. It needs to read 38 degrees or less in the glass of beer you have just poured.
Frosted mugs can also cause foam. When the beer hits the iced mug, it tends to foam. You will notice in some restaurants and bars that they serve their beer at 28 degrees into a frosted mug. This works, but then you have no foam and all the gas is actually released into your stomach (you also can’t taste your beer because it is too cold for your taste buds to detect). If you are getting excessive foam, temperature of the beer is the main culprit the vast majority of the time. Make sure you have your temperature under control before doing additional troubleshooting!
Restriction
Draft beer needs restriction in order to pour properly. Restriction can be obtained by two main methods. One is the inside diameter and length of the beer hose. The longer the hose and the smaller the inside diameter means the slower the beer travels. The slower the beer travels then the less it will foam. A good analogy of this would be to take a crowded 6 lane highway and choke it down to 1 lane. Those six lanes of cars that were traveling at 75 miles an hour are now going be going a lot slower.
The other way to control restriction is to use an inline flow control or a flow control faucet on your draft system. These give you a lot more flexibility as they can change with conditions. For example, if someone opens your kegerator too many times and your beer warms up a few degrees you can adjust the restriction on the fly and reduce foaming. If you have a higher carbonated beer (maybe you over carbonated your homebrew), you can compensate for this as well when using an inline flow control or flow control faucet. Different beers use different carbonation levels. An English beer might be carbonated to 8 PSI, a Belgium to 16 PSI. Trust me when I say that you DO NOT want to have to change your hose length in your kegerator. Even systems using a party faucet can have restriction by using products like the CMB Event Faucet.
Improper restriction can cause excessive foam or even not enough foam to create a proper head. Make sure your system is properly tuned to give you just the right amount of head on your beer!
Carbonation level
Carbonation is our friend! Without it, we are left with flat beer. You can largely control carbonation foaming using restriction and temperature. As I mentioned earlier, it is possible to have a very high carbonation lever and virtually no foam. This will give you a beer that has retained all its carbonation, which will be released into your stomach and released in two ways; neither of which will be appealing to those around you.
Carbonation level is largely determined by the style of beer. Regardless of the style, you still want a uniform head when you pour. If your beer is over-carbonated, you can serve it at a lower PSI for a while and it will lose carbonation as you serve. You can also reduce carbonation by purging some of it via the manual pressure relief valve on a homebrew keg or the manual valve on commercial couplers. Be careful not to over compensate!
Combination of factors and Troubleshooting
Excessive foam is often the result of more than one factor. You might have your beer a little over carbonated, a few degrees too warm, and not have quite enough restriction. You must be methodical in troubleshooting. Always start with temperature. The biggest mistake people make in troubleshooting foaming issues it to assume their temperature is OK. If you don’t have a thermometer in your glass of beer, then you have not ruled out temperature as an issue! Next, look at restriction. If you are using a direct draw system (99.9% of home users are), then you need at least 5’ of 3/16” beer line or flow control. Next, make sure your beer is not drastically over carbonated.
Other issues?
Other issues are not very common but can occasionally raise their big ugly foamy head. Be careful not to jump to these too fast. They are rare and usually when someone thinks it is one of these causes, it is actually one of the main three.
Obstruction – Sometimes the line can have some sort of obstruction that is causing extreme turbulence and in turn foam. Here are some examples I have seen:
Dip tube in homebrew keg pushing hard on bottom or side…or obstruction in dip tube like hops, grains, dirt etc. If you eliminate the obstruction you will eliminate the foam.
Obstruction in hose, faucet, shank, or some other component. This could be machining burr or any other foreign object.
Hose is too high and collecting CO2. This can be a difficult one. Sometimes, when you don’t pour a beer for awhile, the hose will collect CO2. In a tower system or shank system, this will happen but not cause much foam. However, if the hose is in a large loop upwards it can collect a lot of CO2 and will “burp” out a large amount of foam at the beginning of the pour. This is severely aggravated by too high of a temperature and/or over carbonation. If fact, this condition is usually just a symptom of one of the big three.
Gas leak in component. This is when you have a gas leak that is letting outside air in your line. This could be a loose nut or clamp. It can cause a lot of foaming if the leak is severe.
I am probably missing some “other issues” and I will continue to update this section as they come up in my trouble shooting. If you discover any “other issues”, I would love to hear about it and put it in this article.
Remember – when you have a gas leak, look at the three main issues first: temperature, restriction, and carbonation level. Then, explore the more obscure causes. If you still can’t figure it out, I invite you to email me and reference this article. My email is [email protected]. Thank you and happy homebrewing!
Thank you for joining us once again for the Homebrew Happy Hour show! This is the podcast where we answer YOUR homebrew questions and we discuss all things related to craft beer!
With Easter coming soon (as in, a day or two from when we’re publishing this!), we hope you have a wonderfully relaxing weekend with your friends and/or family or even by yourself! I know that, for me personally, I’m super excited because my Dad and I will be sharing our first all-grain recipe we brewed together with our extended family at our Easter gathering. My family loves IPAs (what’s wrong with them, amirite?) so I’m hoping that they’ll love the one we brewed. I think it turned out great but you can probably relate to me in that I think EVERYTHING I do turns out great. I’m just |a little| narcissistic… that’s all! 😉
On Today’s Show:
Todd (Kegconnection) recently received an email from a listener and customer who has been having some foaming issues on one of their kegs, even after switching to CMB flow control faucets. This got Todd thinking and so we take the question and also elaborate on the most common issues that draft systems face specifically in regards to controlling foam and maintaining a proper pour for your beer. Of course, we also have James (CMBecker) and on the show since it’s always his faucets we recommend as solutions so he brings some valuable insight into the world of flow control solutions. As usual, I’m just here to facilitate. 🙂
We want to hear from you!
As always, If you have a question that you’d like us to discuss on a future episode, please click on the “Submit a Question” link at the top of our website or you can now call in your questions via our questions hotline @ 325-305-6107 and leave your message after the beep. This is a friendly reminder that, if we choose your question for a future episode, we give you a $25 gift card to that episode’s sponsor! Easy-peasy, right?
Today’s show is brought to you by Kegconnection.com! Check out Kegconnection’s brand new “Brewer’s Club Rewards” program which gives you points for every purchase and the ability to earn FREE points simply by sharing content or participating in various activities. You can redeem your points for discounts on future orders, FREE SHIPPING, FREE GIFTS, and a whole lot more so go to Kegconnection.com for more information. Homebrew Happy Hour listeners who shop at Kegconnection.com can use the promo code “HHH” to receive 5% off your order.
Thank you for joining us once again for the Homebrew Happy Hour show! This is the podcast where we answer YOUR homebrew questions and we discuss all things related to craft beer!
I love this time of the year. The weather is reasonably pleasant (i.e – not too hot or too cold for comfortable outside brewing!), the flowers are blooming, and it’s the beginning of tradeshow season for the craft beer and homebrewing industries! As you already know, we’ll be in beautiful Providence, Rhode Island, at the end of June and we really do hope to see you there. This week is also a big week for the industry as it’s the annual Craft Brewers Conference in Denver, CO, which is where Todd happens to be right now!
On Today’s Show:
Todd (Kegconnection) calls in from Denver, Colorado to give James (CMBecker) and myself a recap of what he experienced during the Craft Brewers Conference. It’s hard work he does for our show but somebody has to do it… Also, James and I take YOUR questions on homebrew shelf life when your beer is kegged, and we also discuss what we do when we want to use specific ingredients but might have to substitute due to limited availability. We had a blast recording this week’s episode and hope you enjoy it as well.
We want to hear from you!
As always, If you have a question that you’d like us to discuss on a future episode, please click on the “Submit a Question” link at the top of our website or you can now call in your questions via our questions hotline @ 325-305-6107 and leave your message after the beep. This is a friendly reminder that, if we choose your question for a future episode, we give you a $25 gift card to that episode’s sponsor! Easy-peasy, right?
Let us know what you think and enjoy the show!
cheers,
joshua
Today’s show is brought to you by Kegconnection.com! Check out Kegconnection’s brand new “Brewer’s Club Rewards” program which gives you points for every purchase and the ability to earn FREE points simply by sharing content or participating in various activities. You can redeem your points for discounts on future orders, FREE SHIPPING, FREE GIFTS, and a whole lot more so go to Kegconnection.com for more information. Homebrew Happy Hour listeners who shop at Kegconnection.com can use the promo code “HHH” to receive 5% off your order.